TRENDING NOW

Scientists often detect weird sounds in Antarctica, from the groans of melting glaciers to seismic waves rippling through ice shelves. But a space weather station run by the British Antarctic Survey may hold the most diverse selection of acoustic oddities collected on the frozen continent to date.


Now, thanks to BAS researcher Nigel Meredith, these sounds are making their way into art, music, and even the video game Elite Dangerous.


Space weather—from dazzling auroras to dangerous geomagnetic storms—occurs when charged particles from the Sun bombard and interact with Earth’s magnetic field. Scientists have numerous tools for studying these phenomena, including the BAS’s Halley Research Station, which uses very-low-frequency radio receivers to detect electromagnetic waves produced by lightning and geomagnetic storms from its perch on Antarctica’s Brunt Ice Shelf.


Data from these waves, along with data collected by satellites, feeds into forecasting models that can help Earthlings prepare for big space weather events, which can disrupt satellites and even electrical grids. But the radio waves collected at Halley also happen to fall within the frequency range of human hearing, and audio software can be used to convert these electromagnetic signals into actual noise.


And it turns out this noise is some delightfully spooky stuff:


A couple of years back, Meredith started collaborating with artist-engineer Diana Scarborough on “Sounds of Space,” an art project focused on finding creative ways to share Halley’s sounds with the public. He gave a talk on the project at the Cambridge Science Festival in 2017, where an audio engineer from Elite Dangerous happened to be in the audience. Their chance encounter led to a more formal meeting and eventually, a partnership to incorporate sounds collected by Halley into a gameplay update released on December 11.


The VLF receiver at Halley VI used to capture ‘sounds’ of lightning and geomagnetic storms.Photo: British Antarctic Survey

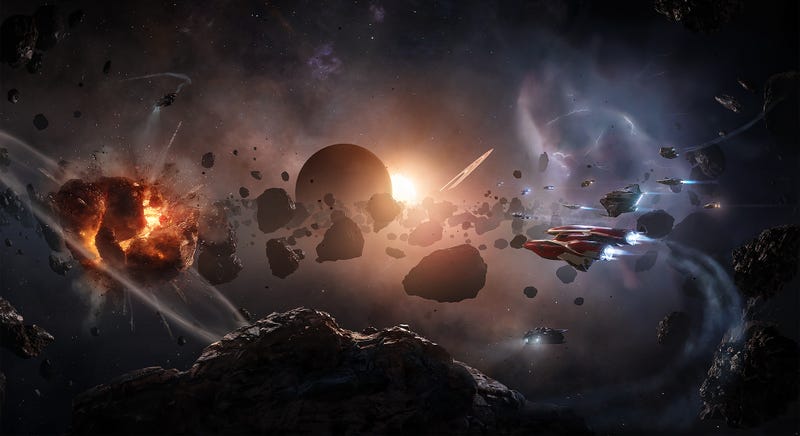
Elite Dangerous, for the uninitiated, is a 1:1 replica of our Milky Way galaxy in which players can trade, fight aliens, or simply explore 400 million procedurally generated star systems. The game is known for hewing to astronomical accuracy whenever possible—by chance, it basically recreated TRAPPIST-1, a system of seven exoplanets NASA announced last year—but with this latest update, players can scan planets across the galaxy and hear sounds based on data picked up at an Antarctic research station.


“When we started updating our exploration gameplay for the latest game update, we knew instantly that the BAS sounds were a perfect fit,” Joe Hogan, lead audio designer for Elite Dangerous, told Earther via email. The team, Hogan said, wanted players to feel like scientists “tuning an old analogue radio, focusing in on signals from planets, stars, and more” while they’re exploring.


The sounds adapted for the game come in a variety of flavors, based on the phenomenon of origin. Lightning storms, for instance, release pulses of radio energy known as “spherics” which sound like hail rattling against a pavement:


Some energy from lightning can also escape Earth’s atmosphere before being dragged into the opposite hemisphere along magnetic field lines. This produces descending tones dubbed “whistlers,” which sound like something the Starship Enterprise’s comm system might pick up from the far end of a wormhole:


Finally, there are what Meredith calls “chorus” emissions generated within Earth’s magnetosphere as it’s being pelted with charged particles from the Sun. Oddly enough, these sound like bird calls and insect buzzes; you can imagine you’re in a rainforest on a distant Earth-like planet:


“It’s mind-blowing that you get such fascinating (and baffling) audio from listening to nature throwing a ton of solar wind at a magnetic ball,” Hogan said, adding that the sheer volume of audio the BAS has cataloged over the years was “simply staggering” for his team to work with.


If intergalactic exploration isn’t your thing, there are other ways to enjoy these geomagnetic soundscapes. Meredith and Scarborough recently teamed up with composer Kim Cunio and dancer Becky Byers to create a multimedia show using Halley’s sounds, which was performed at the BAS Aurora Innovation Centre in Cambridge in November, with more performances planned for 2019.


You can watch the entire November performance below—or, if you’re really feeling like freaking yourself out, might I suggest popping it on in the background while enjoying a silent viewing of John Carpenter’s The Thing?

https://youtu.be/F35SLqBEFw8


President Donald Trump signed a bill last week providing over a billion dollars in funding to quantum research.


After more than three decades of research and work, scientists and tech companies have finally begun to develop technology that operates based on the mathematics of fundamental particles. Though these devices are rudimentary today, they could eventually offer impressive new computing capabilities and even threaten present-day cybersecurity. The new law, called the National Quantum Initiative Act, allocates up to $1.2 billion in funding to keep American quantum information science competitive on the global scale. 


Quantum mechanics is the set of rules by which fundamental particles like electrons interact with each other. Subatomic particles take on particle and wave properties simultaneously while they’re interacting—though they turn back into particles (or waves) once they’re observed. This means that they can enter superpositions, taking on multiple locations or identities at the same time; interfere, making some of these locations or identities more or less likely upon observation; and entangle, meaning multiple particles’ properties become correlated regardless of the distance between them. Quantum information science applies these rules to storing, transmitting, and computing with data, as well as making measurements.


Governments are interested in quantum research because a computer based on the fundamentals of quantum physics, called a quantum computer, could run an algorithm that factors numbers far more efficiently than a classical computer can. Such an algorithm would break the encryption that protects much of our data, and therefore would pose a national security threat. Quantum technology could even be useful in war, via the creation of state-of-the-art positioning systems. The technology may also have societal benefits—a quantum computer might one day beat a classical computer at simulating complex molecules for medical applications, for example.


The bill was one of two first introduced over the summer, and creates quantum infrastructure, including a National Quantum Coordination Office, a Subcommittee on Quantum Information Science, and a National Quantum Initiative Advisory Committee. It includes directives and $80,000,000 per year in funding from 2019 to 2023 for the National Institute of Standards and Technology. It directs the National Science Foundation to create “at least 2, but not more than 5, Multidisciplinary Centers for Quantum Research and Education,” each of which would receive $10,000,000 per year from 2019 to 2023. And it directs the Department of Energy to create “at least 2, but not more than 5, National Quantum Information Science Research Centers,” each of which would receive $25,000,000 per year during the same period.


It’s meant to serve as a coordinated effort to advance quantum science in the U.S., as the European Union and China have done. Some have pitched the race between other countries (especially China) and the United States to advance quantum technology as the next space race. 


The bill highlights training scientists and a multidisciplinary approach—after all, the first quantum computers came about using the same biochemistry techniques employed by MRI machines. It mentions the Department of Defense only once, in an advisory role, despite the department funding early quantum computing effortsand concerns about the cybersecurity threats posed by quantum computing.


Despite promises, it’s still unclear as to when we’ll see real quantum applications that beat existing technology. And of course, nothing is happening so long as the government is shut down. 


Year In ReviewWe look back at the best, worst, and most significant moments of the year, and look forward to new year


2019 is the year that tech gets it together, we can feel it.


Last year, we pegged our hopes for 2018 on ambitious technologies like mixed reality and alien alloys. We learned our lesson. Looking ahead to 2019, we’re excited to see tech wrestle with some of its failures and possibly innovate its way out of the messes it’s created.

Artist’s rendering of the Europa "tunnelbot."

Credit: Alexander Pawlusik, LERCIP Internship Program NASA Glenn Research Center

A group of scientists wants to send a nuclear-powered "tunnelbot" to Europa to blaze a path through the Jovian moon's thick shell of ice and search for life.


Europa, the fourth largest of Jupiter's 53 moons, is one of the best candidates in our solar system for hosting alien life. Researchers believe that its icy crust hides a liquid water ocean and that vents through that crust might deliver the necessary heat and chemical ingredients for life into that ocean.To peek beneath that thick veil of ice, researchers on the NASA Glenn Research COMPASS team (a group of scientists and engineers scattered around the country and tasked with solving problems for NASA) think they have come up with the tunnelbot.

On Friday (Dec. 14) at the 2018 meeting of the American Geophysical Union, the researchers presented a proposal for a "tunnelbot" that would use nuclear power to melt a path through Europa's shell, "carrying a payload that can search for… evidence for extant/extinct life." [Humanoid Robots to Flying Cars: 10 Coolest DARPA Projects]

The tunnelbot, the researchers reported, could use either an advanced nuclear reactor or some of NASA's radioactive "general-purpose heat bricks" to generate heat and power, though the radiation would present some design challenges.

Once on the frozen moon, the tunnelbot would move through the ice, also hunting for smaller lakes inside the shell or evidence that the ice itself might contain life. As it burrows deeper, it would spit out a long fiber-optic cable behind itself leading up to the surface and deploy communications relays at depths of 3, 6 and 9 miles (5, 10 and 15 kilometers).

Once it reaches the liquid ocean, to keep from "falling through," it would deploy cables or a floatation device to lock itself in place, the researchers wrote.

At this stage, this is just a rough theoretical proposal. The researchers haven't actually designed the payload for sampling Europa's water and ice, or figured out how to get the tunnelbot onto the moon. As Live Science has previously reported, that's a task that poses some significant mysteries and challenges (like possible giant, robot-destroying spikes).

Still, the proposal provides a fascinating window into what a future robotic mission to Europa might look like, and how we might eventually begin to explore whether the distant moon harbors life.

A robotic arm moving a solar array up
and down along a space structure, and a
robotic hand and jigging system
autonomously building truss segments –
sounds like a scene from a science
fiction movie, but it’s just another day in
the office for NASA engineers.
This week marked the last in a series of
ground tests demonstrating the
capabilities of the Tendon Actuated
Lightweight In-Space MANipulator
(TALISMAN) robotic arm; the Strut
Assembly, Manufacturing, Utility &
Robotic Aid (SAMURAI); and the NASA
INtelligent Jigging and Assembly Robot
(NINJAR) components of the
Commercial Infrastructure for Robotic
Assembly and Services (CIRAS) project.
Earlier this year, the team of engineers
manipulated the newer, longer arm back
and forth from folded to extended
positions to demonstrate that it is fully
operational, then they showed it could
pull a truss out from being stowed in a
compartment. In this demonstration, the
TALISMAN arm was used to move a
solar array from one truss section to
another and to install the array.
SAMURAI, the robotic hand that passes
truss parts, and NINJAR, the jigging
robot that holds the pieces in place while
they are fastened, have similarly been
put to the test this year. The team first
used a remote control to operate the two
robots and assemble truss segments.
This most recent test accomplished an
autonomous truss build, using only code
and no remote control.
CIRAS is a part of the In-Space Robotic
Manufacturing and Assembly (IRMA)
project portfolio, managed by NASA’s
Technology Demonstration Missions
Program and sponsored by NASA’s
Space Technology Mission Directorate.
The CIRAS team includes prime
contractor Northrop Grumman, supported
by its subsidiary, Space Logistics, LLC;
NASA’s Langley Research Center in
Hampton, Virginia; NASA’s Glenn
Research Center in Cleveland, Ohio;
NASA’s Goddard Space Flight Center in
Greenbelt, Maryland; and the U.S. Naval
Research Laboratory in Washington, D.C.
Phase 1 of the CIRAS project will end
later this year. Northrop Grumman and
Langley recently submitted a proposal
for a Phase 2 contract to demonstrate
these same capabilities on orbit.

When the Pixel 2 first launched, there wasno shortage of unofficial apps designed to brings Google’s best new software to other Android phones. The only issue was that you had to cobble together a bunch of smaller tweaks or root your phone to get the full Pixel 2 experience on older hardware. Now there’s finally a root-free solution that offers all the best features in one package.

The Rootless Pixel Launcher 3.0 is available for any device running Android 5.0 Lollipop and up. Beyond the usual Pixel 2 perks, it also includes some of the enhancements Android modders have come to expect from other launchers, along with a few extra improvements from the app’s creator, Amir Zaidi.

One of the biggest reasons to install the launcher is At a Glance, a special Pixel 2 widget that shows your next calendar event on your home screen at all time right next to the weather. Pressing down on the center of an app icon will also launch a pop-up menu with shortcuts and notifications. The download even comes with special icon designs, including a calendar icon that changes with the date.

XDA-Developers

If you want to install the Rootless Pixel Launcher 3.0 you’ll have to sideload, since it’s not available from Google’s Play Store. The first thing you’ll need to do is enable Unknown Sources by heading into Settings on your phone. Then hit Security, select “Lock screen and security” and toggle on “Unknown sources.”

With that done you can download the new launcher. Then find it in your Android notification tray and tap on the file to install it. Once it’s finished, hit the home button and Android will ask you to pick a new home screen app. Select “Pixel Launcher” and set it to Always.

That’s it. You’re done and you’ve got a shiny new Android launcher to play with. For more info, head to the developer’s announcement on Reddit for a full list of features and a detailed guide for getting started.

Back during the lead up to CES 2018, Samsung made a quite few new notebook announcements. At the time, the company shared information about specifications and features, but failed to announce release dates and pricing for them. Today, that all changes, as Samsung has revealed when we can expect the new entries in the Notebook 9 line and the 2018 Notebook 7 Spin, along with how much they’ll cost.

First up is the Notebook 9 Pen, which was first announced back in December. This 2-in-1 notebook is named partially for the included S-Pen, which can be used to write and draw while the Notebook 9 is in its tablet configuration. With its 8th-gen Intel Core i7, 8GB of RAM, and 256GB of storage, the 13-inch Notebook 9 Pen will run $1399.99.

If you don’t need the 2-in-1 convertible Notebook 9, Samsung has new devices in the line that offer the traditional clamshell design many of us are used to in our notebooks. There are three new standard Notebook 9s on the way, two of which have a 13.3-inch display. Those who want a more powerful notebook can pick up the 15-inch Notebook 9, which has the option of an external graphics card as well.

The 13.3-inch Notebook 9 with an 8th-gen Core i5, 8GB of RAM, and 256GB of storage will set you back $1,199.99. For $100 more, you can jump up to a Core i7, though RAM, storage, and screen size all stay the same. Finally, that 15-inch Notebook 9 will run $1,299.99 as well, though if you want to add an external NVIDIA GeForce MX150, you’re looking at a final price of $1,499.99. Other than those differences, it seems that these Notebook 9 variants are using the same hardware throughout.

Finally, we come to the 13.3-inch Notebook 7 Spin, which has similar internals to the 13.3-inch Notebook 9 though also comes with Active Pen functionality. This lower-end model will run you $899.99, and all of these notebooks will be available starting on February 18. All Notebook 9 models will be available either at Amazon or Samsung, while the Notebook 7 Spin can be purchased by going to Samsung.com or in-store at Best Buy.

This wikiHow teaches you how to recover the photos and other data from a malfunctioning memory card. It will also teach you how to reformat the memory card for continued use if the memory card is repairable.

Part One of Three:
Recovering Your Card's DataEdit

Stop using the card immediately if you haven't already. If your camera displays a message that says "Card Error", "Read Error", or something similar, turn off the camera and remove the memory card. Continuing to try to use the card after this point will reduce the likelihood of you recovering all of the data on the card.[1]

Search for a data recovery program.While your card might be done for, there's still a possibility that your data is recoverable. Some of the most popular free data recovery programs include the following: [2]Recuva - After you select your hard drive location (in this case, your SD card) and check the "Photos" option, Recuva does all the hard work in the background. Recommended for most users.CardRecovery - After a brief setup, CardRecovery scans any attached SD cards. Once your evaluation period with CardRecovery is up, you'll need to pay to continue using its services.Photo Rec - This program has a minimal interface and requires basic knowledge of how to navigate the Command Prompt program, so it isn't recommended for beginners.

Download and install your selected data recovery program. Typically, this process will entail opening your recovery program's page, clicking the Downloadbutton, and double-clicking the downloaded setup file.The location of the download button will vary from site to site. If you can't find it, try looking for it on the top or the side of the site's page.

Connect your memory card to your computer. Most PCs have a thin, rectangular memory card slot with the word "SD" next to it. This will most likely be on the side of the computer's casing if it is a laptop, or somewhere on the CPU box if it is a desktop.If your PC or Mac doesn't have an SD card slot, you can buy an SD card reader that plugs into your computer's USB port for less than $10.[3]You may have to allow your computer permission to use your SD card before you can access it.

Open your data recovery program. It should be installed in whichever location you chose earlier.

Follow the on-screen directions. You'll usually need to select the memory card as the location to scan and select the "Photos" option in your data recovery program's scan criteria before you can successfully scan your attached SD card.After the scan completes, most programs will give you the option of restoring or exporting all salvageable photos to a location of your choice (e.g., your desktop).

Part Two of Three:
Repairing a Memory Card on WindowsEdit

Connect your memory card to your computer. You can usually do this using the long, thin memory card slot with the word "SD" next to it that's built into your computer. It will most likely be on the side of the computer's casing if it is a laptop, or somewhere on the CPU box if it is a desktop.If your PC or Mac doesn't have an SD card slot, you can buy an SD card reader that plugs into your computer's USB port. These usually cost less than $10.You may have to allow your computer permission to use your SD card before you can access it.

Click ⊞ Win. It's in the bottom left corner of your screen.

Type "My Computer" into the search bar. While the "My Computer" application is called "This PC" or "My PC" on Windows 8 and 10, typing "My Computer" will redirect your search to your computer's default version of My Computer.

Tap the ↵ Enter key. This will open the This PC window.

Review the "Devices and drives" section.This is on the bottom half of the "This PC" window. You should see a drive marked "OS (C:)" here (this is your primary hard drive) as well as any other connected drives, one of which is your memory card.If you cannot tell which disk is your memory card, remove your card with this window open and note the drive that disappears. Remember to reinsert you card before continuing.

Note your memory card's drive letter.The computer's default hard drive letter is "C", so your memory card will be a different letter.

Hold down ⊞ Win and tap X. This will open the Windows quick-access menu over the Start button in the bottom left corner of your screen.You can also right-click the Startbutton to open this menu.

Click Command Prompt (Admin). Doing so will open the Command Prompt program which will let you reformat your memory card.If you aren't using your computer's administrator account, you won't be able to do this.

Type chkdsk m:/r into Command Prompt. You'll need to replace "m:" with your memory card's drive letter (e.g., "e:"). The "chkdsk" function checks your selected disk for corruption and then reformats the areas in need of repair.There is only one space between "m:" and "/r".

Press ↵ Enter. This will initiate the disk checking process. If Command Prompt finds any repairable issues, it will fix them if possible.If Command Prompt asks for permission to continue, press Enter to grant it permission.You may get an error that says "Cannot open volume for direct access" after hitting Enter. This error usually means that your disk either does not need formatting (e.g., it isn't damaged) or it is beyond repair.In some cases, the "Cannot open volume for direct access" error is a result of your computer's antivirus preventing the formatting process. Try disabling your antivirus program while reformatting your drive to see if it fixes the issue.

Remove your SD card. Once the process is complete, you can safely remove your SD card from your computer and place it back in your camera.

Part Three of Three:
Repairing a Memory Card on MacEdit

Connect your memory card to your Mac.You may need to buy an SD card readersince not all Macs come with an SD card slot.If your Mac does have an SD card slot, it will be on the side of the casing (laptop) or on the back of the CPU box (desktop). It may also be on the side of the keyboard on some desktop units.Some devices require that you enable disk use via USB through its settings before your computer will recognize it.

Open your Mac's Finder. This is the blue face icon in your dock.

Click Go. It's in the toolbar at the top of the screen.

Click Utilities. This will open the Utilities folder, from which you can run the Disk Utility.Alternatively, you can hold down ⇧ Shift and ⌘ Command and then tap U to open Utilities.

Double-click Disk Utility. This app resembles a grey hard drive with a stethoscope on top of it.

Select your memory card. It should be listed under the "External" section in the left-hand pane of the Disk Utility window.If you don't see your memory card listed here, try removing and re-inserting the memory card.

Click First Aid. This is the stethoscope icon in the row of options at the top of the Disk Utility window.[4]

Click Run. If you see a pop-up window that says "Your disk is about to fail" instead, you won't be able to repair your memory card.[5]

Wait for your memory card to be repaired. Once your Mac tells you the process is complete, you may safely remove your memory card and place it back in your camera.You may see an error entitled "The underlying task reported failure" here. If so, try restarting your Mac and running the repair again.

You can avoid memory card corruption and errors by refraining from removing your card during saving or writing, avoiding saving when your device’s battery is low, and powering off your device before removing your card when possible.

Memory cards do not last forever. Flash memory has a lifespan of anywhere from 10 thousand to 10 million write and erase cycles, so it is recommended to keep backups and replace memory cards every few years, depending on how heavily the cards are used.

A new eight gigabyte SD card will usually run you less than $10.

Even if your card is fixable, consider purchasing a new card instead of reformatting your old one. Formerly corrupted cards are far less reliable than a new SD card.

If you’ve been an Android user for several years, you might think you know the Android settings menu inside out. After all, there’s no way you’d have accidentally overlooked a useful option, right?

Unfortunately, you probably have overlooked something. These days, the Android settings menu is a sprawling maze of menu and sub-menus. It’s hard to find the more obscure options.

But which of the settings you’ve overlooked are useful, and which can live on in peaceful obscurity? Let’s find out. (Depending on your device’s manufacturer, some of these settings might not be available.)

1. Screen Magnification

Do you ever come across a really small font or tiny picture while you’re browsing the web?

If you’re using a browser on a desktop machine, it’s easy to zoom in and take a closer look. And, of course, Windows and macOS both offer a robust set of accessibility tools.

On mobile, it’s a different story. Some web pages allow you to use the pinch-to-zoom gesture, whereas others aren’t compatible with the feature. It all depends on how the site is coded.

Android offers a solution. Open theSettings app and navigate to Accessibility > System > Magnification Gesture and slide the toggle into the On position.

When enabled, triple-tap the screen to zoom in, and navigate by dragging two fingers around the display. You can adjust the level of zoom by pinching. Triple-tap again to return to the standard view.

Alternatively, triple-tap the screen and keep your finger pressed down on the third tap. It will temporarily zoom the screen until you release your finger.

2. Invert Screen Colors

The accessibility menu offers a couple of other useful features that we’ll look at. Firstly, let’s check out how to invert your screen’s colors.

For someone with a visual impairment, this has obvious advantages. But it’s also useful for everyone else.

Just think, how many times have you wished an app had a “dark” theme? And how many times have you given yourself sore eyes because you’ve used a bright screen in a dark room? Sure, there are third-party apps that can alter your screen’s color temperature, but this is an easy-to-use native alternative.

To invert your Android’s screen, open theSettings app and go to Accessibility > Display > Color Inversion. Slide the toggle into the On position to get started.

Using the feature has a couple of caveats. Firstly, your device may not perform as efficiently. Secondly, there’s no shortcut -– you’ll have to go into the Settings menu every time you want to enable or disable the inversion.

3. Add More Printing Services

Occasionally, it’s useful to be able to print a document from your smartphone. Perhaps you forgot an important letter or need to produce a copy of your ID.

Google Cloud Print has been part of the Android operating system for a long time. However, despite being a long-term feature, the service doesn’t feel solid. Print jobs often fail, and if you’re using an old printer, adding it into the app is a painstaking process.

Luckily, you can easily add more printers to your devices. Plugins are available from all the leading printer manufacturers, including HP, Brother, Canon, Xerox, and Epson. There are also a few cross-printer third-party apps to choose from.

To add a printer plugin, go to Settings > Printing > Add Service. A list of all the available plugins will appear. To add one to your phone, tap on the icon and clickInstall.

4. Make Passwords Visible

If you follow proper security etiquette, your password should be long, use a mix of numbers and letters, include uppercase and lowercase characters, and use some special characters.

On paper, that sounds great. In practice, it’s annoying –- especially on a mobile device. It takes a long time to enter it when you’re using an on-screen keyboard. Worse yet, you don’t even know if you made an error; your phone typically obscures your password using stars or dots.

If you find that you have to constantly re-enter passwords due to typos, this setting could be for you. Enabling it will mean your password will be visible on-screen in plain text.

To make all your passwords visible, go toSettings > Security > Passwords > Make passwords visible and slide the toggle into the On position.

Warning: This setting has obvious security implications. If you enable it, make sure nobody is looking over your shoulder when using your online banking or other sensitive services.

5. Set Your Billing Cycle

Although the general global trend is towards an unlimited data allowance on your cell phone contract, there are many carriers –- especially in the United States — that restrict your allowance.

If you go over your allowance, you’ll either be forced to pay out for an expensive add-on to keep you online, or you’ll receive a shock when your bill arrives.

If you set your billing cycle, you can monitor how much data you’re using over the 30-day period and adjust your usage accordingly.

To set up your bill date, go to Settings > Data Usage > Billing cycle > Billing cycle. In this menu, you can also choose whether you receive warnings when you get close to your limit, and even disable mobile data entirely if you go over it.

To see how much data you have used in a given period, tap on Mobile data usage. You’ll be able to see a neat graph that shows you which days your usage was unusually light or heavy.

6. Touch and Hold Delay

For the final setting, we head back to the Accessibility menu. Did you know it was possible to change how much time you need to hold your finger down for during a “long press”?

If you frequently find yourself needing access to the copy and paste context menu, setting the time to the shortest available option is a huge timesaver.

To make your selection, open the Settingsapp and navigate to Accessibility > System > Touch and hold delay. You can choose from ShortMedium, or Long.

What Other Android Settings Are Useful?

In this article, we’ve introduced you to six underused and underappreciated Android settings on your device.

Now most peoples are using android phones. Because those phones have many cool user friendly features. But do you know about that? You can't keep your android phone battery long lifetime because this features are wasting it. So I thought tell you how to use your android phone battery as long time with few small tricks.But you really don't need your phone ALL the time.

Turn it Off. Obviously this is not an option but you can keep your battery life with this tricks. If you didn't use your phone some long period then turn then turning your phone off is the easiest way to save battery life.

Turn Off Vibrate And Keys Tones. This function is wasting your battery life much more. So if you didn't want vibrate and key tones turn off them. You can also set your ring tones to a low volume to save extra power.

Decrease Screen Brightness. You can save your power via decrease screen brightness. If you can set your screen brightness 50% or lower. If not set it automatically, but never set it 100%.

Don't Use Live Wallpapers. Live wallpapers is one of the cool feature on android phones. But they use your battery charge much more.

Turn off Bluetooth and WiFi. Bluetooth and WiFi is mostly using features on mobile phones. Also they reduce your battery lifetime. So disable them when they’re not in use.

Close Unwanted Applications. Apps using battery power as long as there open. So close unused applications on your programme list.

Charge Your Battery Before It Dies. You must charge your phone before it fully discharges of its power. If not your battery lifetime reduces very quickly. This trick is very important.

Use Hands free. If you watching movies or listening music use Hands free. Don't use phone speakers to do it.

Turn Off Flash Lights. Avoid using the flash on camera phones. The little flashes are powerful and therefore use lots of energy. So don't use flash lights every times.

Limit the screen timeout. Most cell phone screens will stay lit for a specified period of time after receiving input such as a swipe or tap. Set the timeout to the shortest available in your settings so the display will essentially go into a sleep mode when not in use.